The title of this article is tricky to say, and getting your product pictures to display correctly in your e-commerce website can be a little bit tricky as well.
Pictures from your camera are rectangular, but rectangles can make your e-commerce shop look unsightly because your products don’t align evenly across the page. This is especially true if some pictures are taken in landscape mode and others are taken in portrait mode (horizontal vs vertical, if you prefer).
Many e-commerce software solutions, including NuggetWeb Merchant Shops, try to help you by cropping your images into perfect squares. This helps improve the overall look of your website, but if your your product images aren’t cropped correctly, then your products may be aligned to one side, or even partially cut off.
To make sure your product images look great every time, re-size and crop your images just the way you want using a tool like Pixlr (http://pixlr.com).
Pixlr is a free service that lets you do incredible things with images, including re-sizing and cropping them. Pixlr also offers apps for iPad, iPhone and Android devices, making it super-convenient to use.
Today, however, we’re just going to talk about the Pixlr Editor, which allows you to do all of your editing right in your web browser. Getting started is easy. Just open your web browser to http://pixlr.com, and click on the Pixlr Editor.
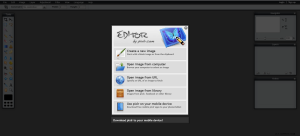
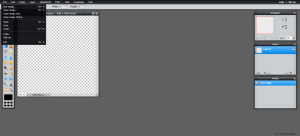
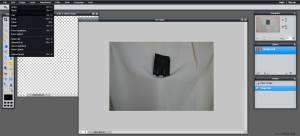
We’ll get to re-sizing your products pictures in a minute, but the first thing we’re going to do, is create a “template” image that will come in handy every time you want to upload new images of your products. To do that, click on the Create New Image link in the Pixlr Editor.
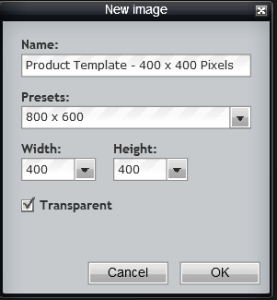
Pixlr will ask you some questions about the image you want to create. Let’s name it “Product Template – 400 x 600”, and set both the width and height to 400. Whether you create a transparent image or not won’t matter for what we’re doing, so you can leave it unchecked if you like. Click ‘OK’ when you’re ready to move to the next step.
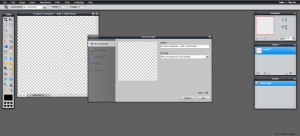
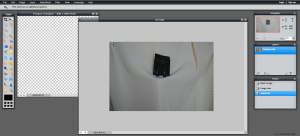
Now you have a template for your product images. This is a blank image that we’re going to use to make your product pictures look great, but for now let’s save it so we’ll have it available whenever we need it.
In the upper-left corner of your Pixlr editor, click ‘File’ and then ‘Save’.
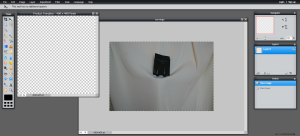
Now you can give your template a name. Let’s name it something that’s easy to recognize – ‘Product Template – 400 x 400 Pixels’. For the ‘Format’, choose ‘PNG (Transparent, full quality)’.
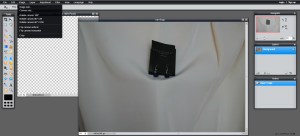
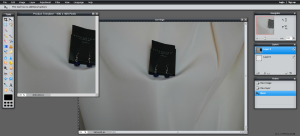
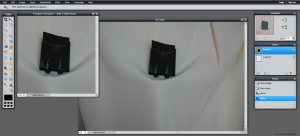
Next, open your product image by clicking the ‘File’ menu in the upper-left corner again, and choose ‘Open image’. Navigate to your product images, and choose the file you wish to use. For our example, we’re going to use a picture of some earrings.
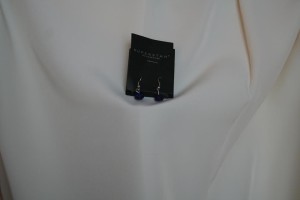
You can see that our earrings don’t use much of the space available in this picture. What we want to do, is re-size our product image so it will fit inside the dimensions of the template image we created, which is 400 pixels by 400 pixels.
Before we can do that, we need to know what the dimensions of the earrings picture are, and Pixlr makes that a snap. Just click on the ‘Image’ menu in the upper-left, and select ‘image size’.
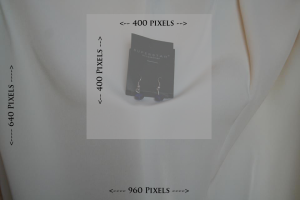
In most cases your product will take up much more of the space available in your picture, and you would re-size your image so the shortest edge is 400 pixels. That would make our the dimensions of our image 600 x 400 pixels.
Our earrings picture was taken a little far away, however, so we need to leave a little extra outside of the template dimensions. For our earrings, let’s set the dimensions so the shortest image is 500 pixels so we lose some of the extra background from our picture. As long as you don’t uncheck the box labeled ‘Constrain proportions’, the long edge will automatically be re-sized to 750, making our image 750 pixels by 500 pixels.
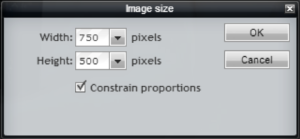
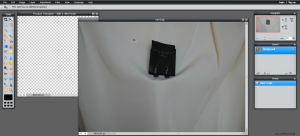
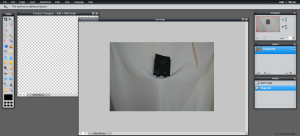
Once you click ‘Ok’, Pixlr will re-size the image.
The next part is kind of fun once you get the hang of it, but it’s a four-step process. All four steps use the ‘Edit’ menu in the upper-left of your Pixlr screen.
Now we have our old picture in the 400 x 400 template, but it’s not centered. To fix this, just click somewhere in the middle of the template image and, while holding your mouse button down, drag the product to center it in the middle of the picture.
You’re almost done! Now just save the file to your computer, and it is ready to upload to your Merchant Shop! Click the ‘File’ menu and choose ‘Save’. Don’t forget to change the name of the new file, or you will overwrite your blank template file. If you do, just create another one. Once you get the hang of it, it will only take a few seconds.

That’s it! Your product image is now square, centered and will look great in your Merchant Shop. A few tries at this and you’ll be re-sizing and cropping images at blazing speed, and your e-commerce shop will look fantastic!
Do you have tips for getting the perfect product image? Let us know on Facebook or Twitter!